General
A superb set of boulders with problems of exceptional quality above generally flat landings. The problems on the summit boulder rate as some of the very best Hong Kongs has to offer.
Approach
Follow the approach to Ha Fa Shan until the shelter at the top of the hill. From here turn left and follow a dirt path around a small knoll. Continue along the concreted path ahead up the gently sloping hillside. Follow the path up the hillside until its very end and continue rightwards on a dirt path, which eventually becomes concrete once again. Continue along this until another path breaks right just past a reforestation signboard. This leads up to a small abandoned school, from where a dirt path leads up and left to the boulders themselves.


Routes

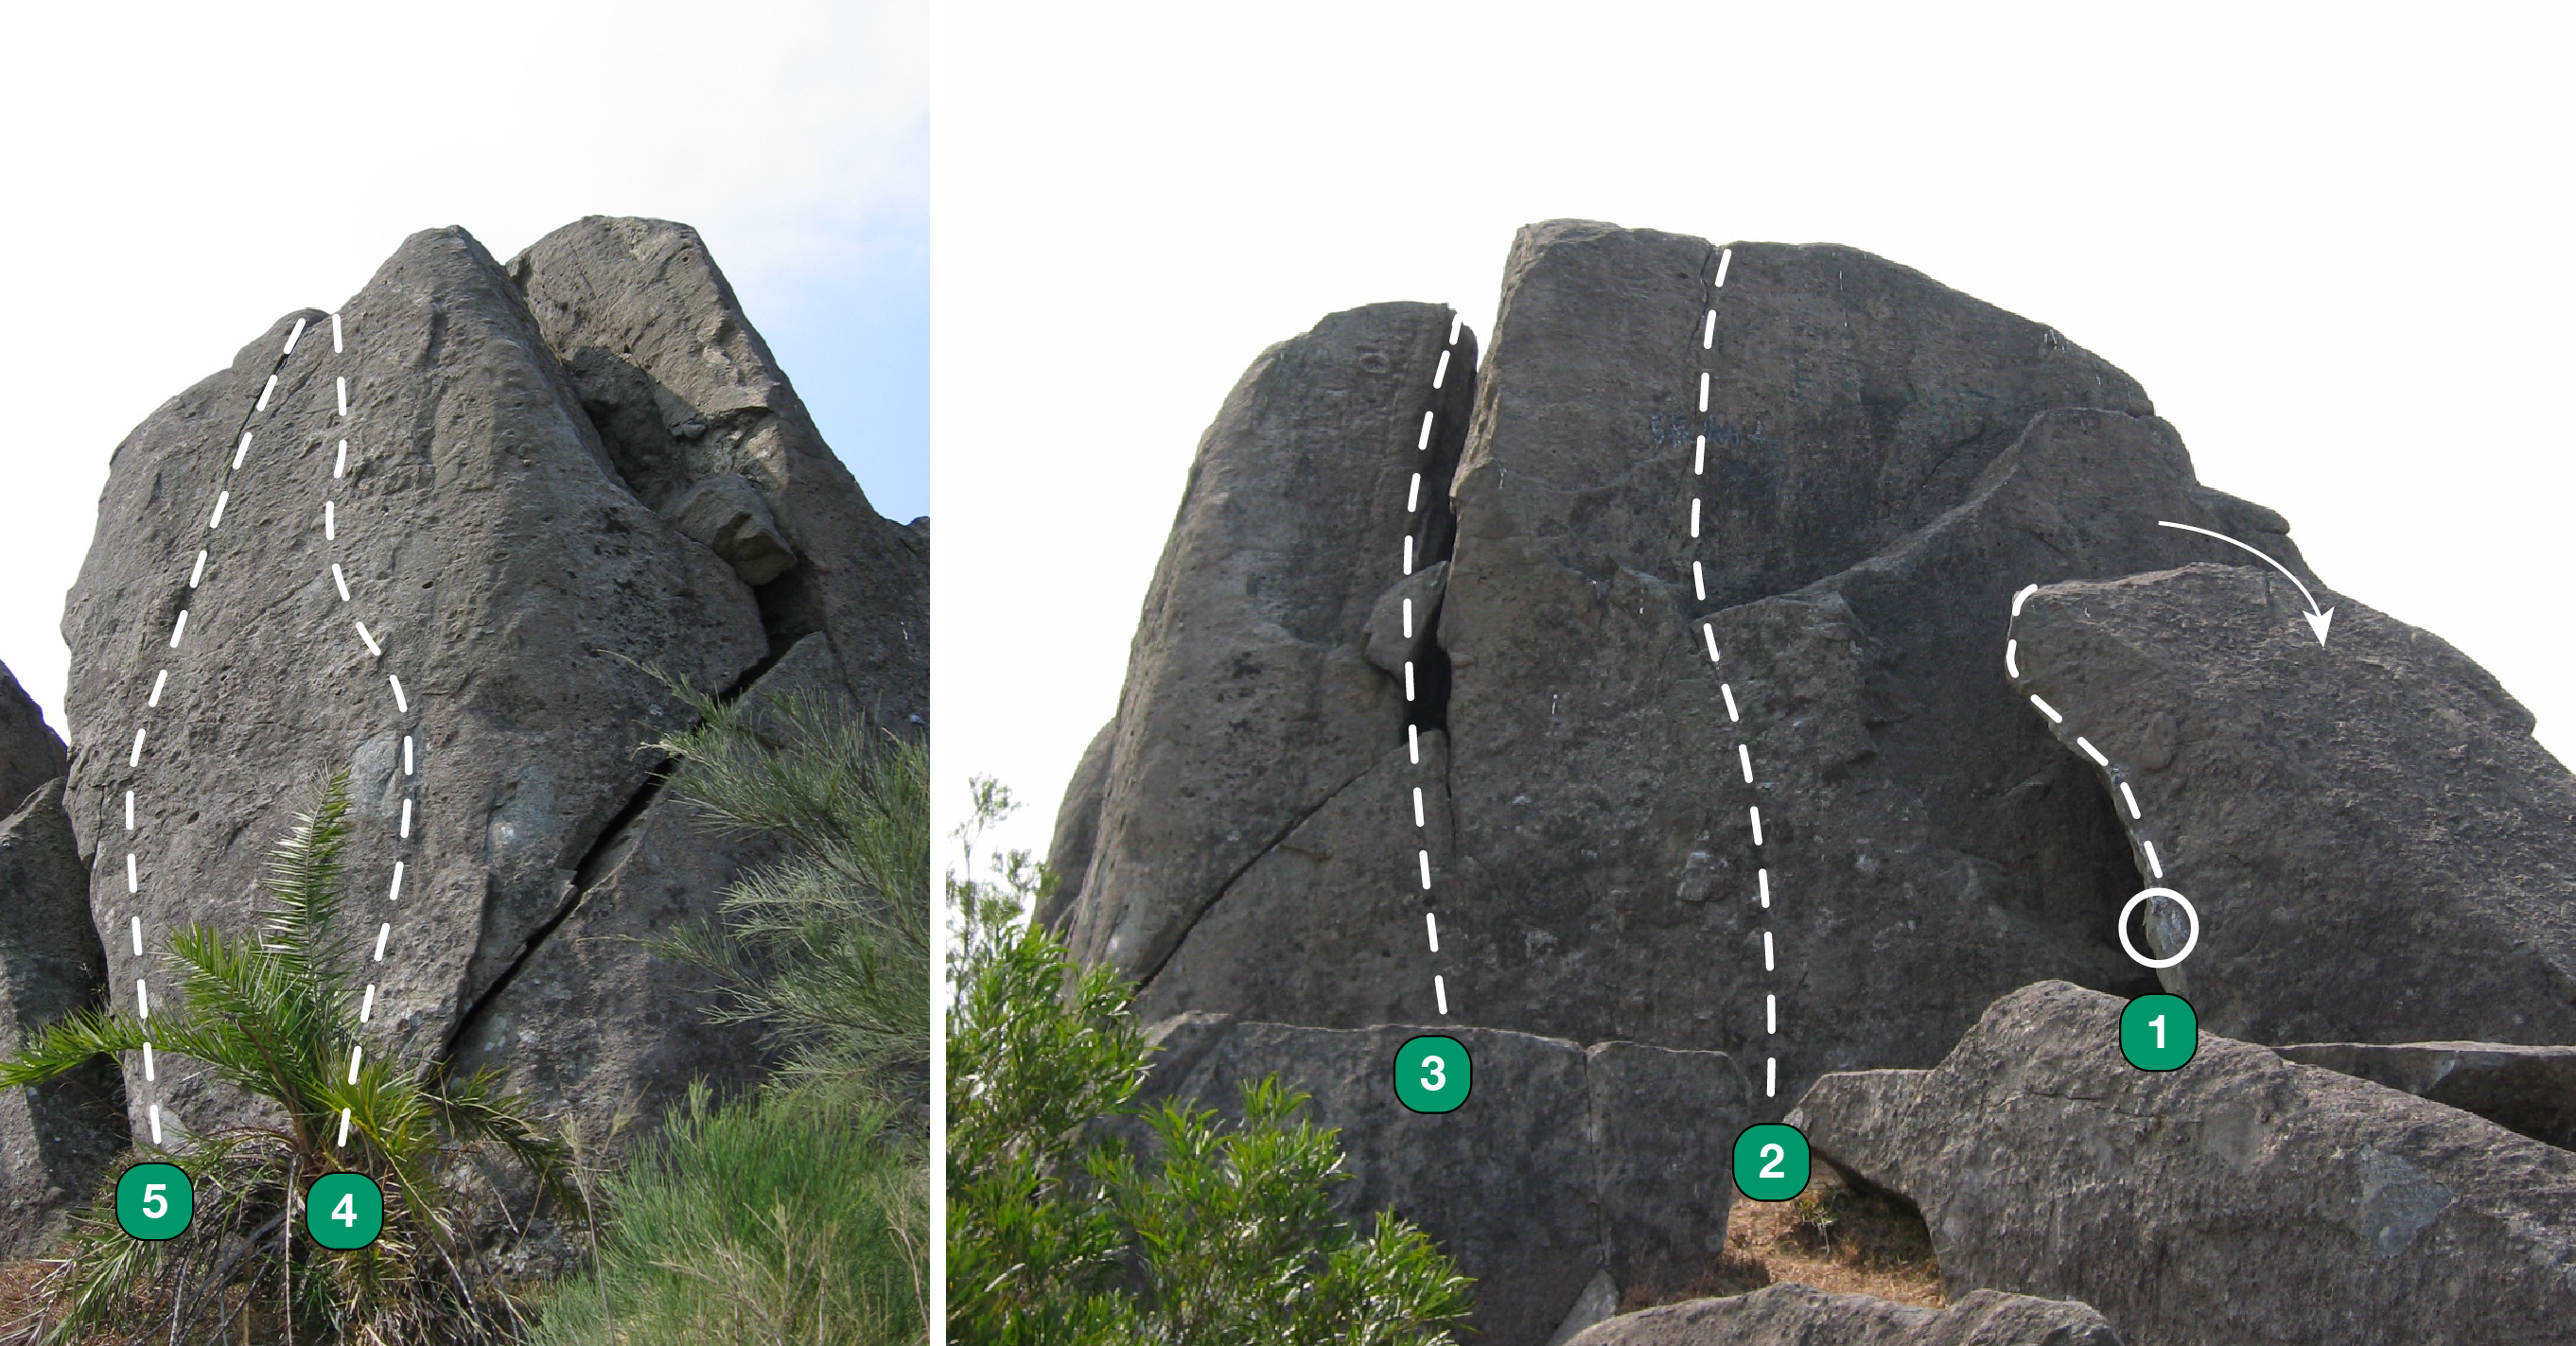
1) The Ramp * V0
The thin wall and ramp.
2) Crossly Wall ** V1
The centre of the wall, via an assortment of crossly protrusions.
3) Descent Arete * VB
The left-hand arête also forms the easiest way off the block.

1) Flake Crack ** V0
The rightwards trending crack and flake.
2) Superhardness *** V6
From a large horizontal break, make thin technical moves up the wall to a crimp at the lip, alternatively, forget technique and dyno.
3) Crack and Flake V0
The leftwards trending crack and flake.

1) Slanting Crack ** V0
The leftwards trending crack line.
2) Incisor (sds) ** V4
From beneath the fang shaped piece of rock, slap upwards to a horizontal break and finish direct above this.
3) Crossly Slab *** VB
Pick any line up the gently inclined slab.

(1) V2 * Ritchies Rib. The righthand arete of the face.
(2) V6 * Ritchies Rib (sds). As for Ritchies Rib but starting low with very small sidepulls either side of the arete. Your bum must be on the floor when you start this one!
(3) V2 *** Wall Direct. The centre of the wall without resorting to any use of either arete.
(4) V0 – 5a ** School Arete. The lefthand arete of the thin face.
(5) V3 ** School Arete (sds). Start on the flat ledge about 2ft off the floor and throw for the big horizontal break. Finish as for School Arete.
(6) V2 ** Pebble Wall. The centre of the rippled slab via thin quartz seams and the odd pebble.
(7) VB – 4b* School Slab. The thin, short, seam up the slabby wall.

(1) V3 ** Bald Slab. A tricky little number which feels quite stiff for the grade. The bald, almost featureless, bulge requires complete and utter faith in friction.
(1a) V5 * Bald Slab (sds). The sit start.
(2) V2 * The Spike. Step off the small spike at the base of the boulder and pull onto the slab above.
(2a) V6 * The O Influence (sds). From a low crimp left of the detached spike, pull up and climb the slab.
(3) VB – 4c Shallow Groove. The shallow groove on the right side of the boulder.
(4) VB – 4c The Overlap.

1) Overhang and Crack ** V0
The small roof at the lefthand side of the block. Following the thin crack above to the top. Using the right crack only increases the grade to V1.
2) Burned (sds) *** V6
Starting at a good lay away with the left, follow small holds and mono’s up the wall between ‘Overhang and Crack’ and ‘The Stretcher’ to a good pebble and ledge.
3) The Stretcher *** V4
Start on small crimps in the rightward trending seam. Climb the seam before making a long stretch left into a hanging groove. Follow this to the top. Powerful.
4) Stretcher Direct *** V6
It is possible, just, to avoid the sloper on Stretcher Variant and climb the wall directly above the end of the seam.
5) Stretcher Variant *** V4
Start as for Stretcher but instead of moving left make long moves right onto a sloper. Finish directly above this.
6) So High *** V9
Start directly beneath the sloper of Stretcher Variant and dyno for this from the small crimps. Definitely a climb for low gravity days only!
7) Over Stretched *** V5
Start at the left hand side of the block, by the small cave. Make a rightwards traverse, just above the floor (no using the holds above the small roof ), to join the seam on The Stretcher. Finish as for Stretcher Variant.
8) Gaping Crack * VB
Climb the obvious large crack splitting the block. Either arete of the crack can also be climbed independent of the other at about V2.

9) Dislocator (sds) *** V6
From a sitting start at the left end of the leaning block, powerfully traverse right along the sloping lip to a difficult finish on holds above the small cave.
10) The Full Monty (sds) * V7
Follow Dislocator to the mantle but swing right across the cave to join the start of Over-Streched. Follow this to its end.

(11) V5 ** Mono-poly
Start at the right end of the slab and move up and left, via slopers, mono’s and crimps, to a thin finish.
(1) V2 *** Weeping Hands (sds) The underside of the arete of the leaning block from a sitting start, avoiding the wall behind.
(2) V1 Rib and Wall. The thin rib and wall to the large ledge.
(3) VB – 4c. The large crack to the left of Rib and Wall.
(4) V2 *** Palm Rib. The excellent thin wall/rib directly above the small palm tree (don’t fall as the tree doesn’t make a comfy landing – its been tested!!!)
(5) V2 ** Palm Slab. Tackle the centre of the thin wall.